Clutch Kit Installation: How Hard Is It and What You Need to Know
 Jul, 25 2025
Ever stared down at a car with a blown clutch and thought, “How hard can it really be to swap this out?” You’re not alone. Loads of drivers hit this crossroads—should you save a stack on labour by tackling a clutch kit installation at home, or is it best to pay for the pros? The kicker: it’s not just about confidence or cash. Clutch jobs rank high in the world of DIY auto work, but there’s a surprising mix of skill, tools, and pure muscle needed to pull one off. Let’s roll up our sleeves and dig into what really goes on when you’re swapping out something this important under your bonnet.
What Makes Clutch Kit Installation Tricky?
No two cars are quite the same, but most clutch setups share enough DNA to come with similar headaches. First up: space. Modern cars are a puzzle beneath the surface; their engines, gearboxes and criss-crossing wiring harnesses seem to have been designed by someone with very tiny hands. So, expect to spend most of your time crammed half-underneath the car or squinting at bits nobody can reach without triple-jointed wrists.
Stripping out a clutch isn’t just a matter of unbolting the old and bolting on the new. You’ll probably need to disconnect the battery, pull off the driveshaft, and drop the gearbox before you even see the clutch itself. The gearbox alone, especially in front-wheel drive cars common across the UK like the Ford Fiesta or Vauxhall Corsa, can weigh as much as your nephew after a Sunday roast—50 to 80 kilos is typical. You’ll need a jack or even better, a transmission hoist, which most home garages simply don’t have.
Here’s a surprising fact: While manufacturers claim clutch kits will last 60,000 to 100,000 miles, British weather and heavy traffic mean many need replacing sooner—sometimes before the car hits 50,000 miles. That’s often down to stop-start city traffic, where clutches work hardest.
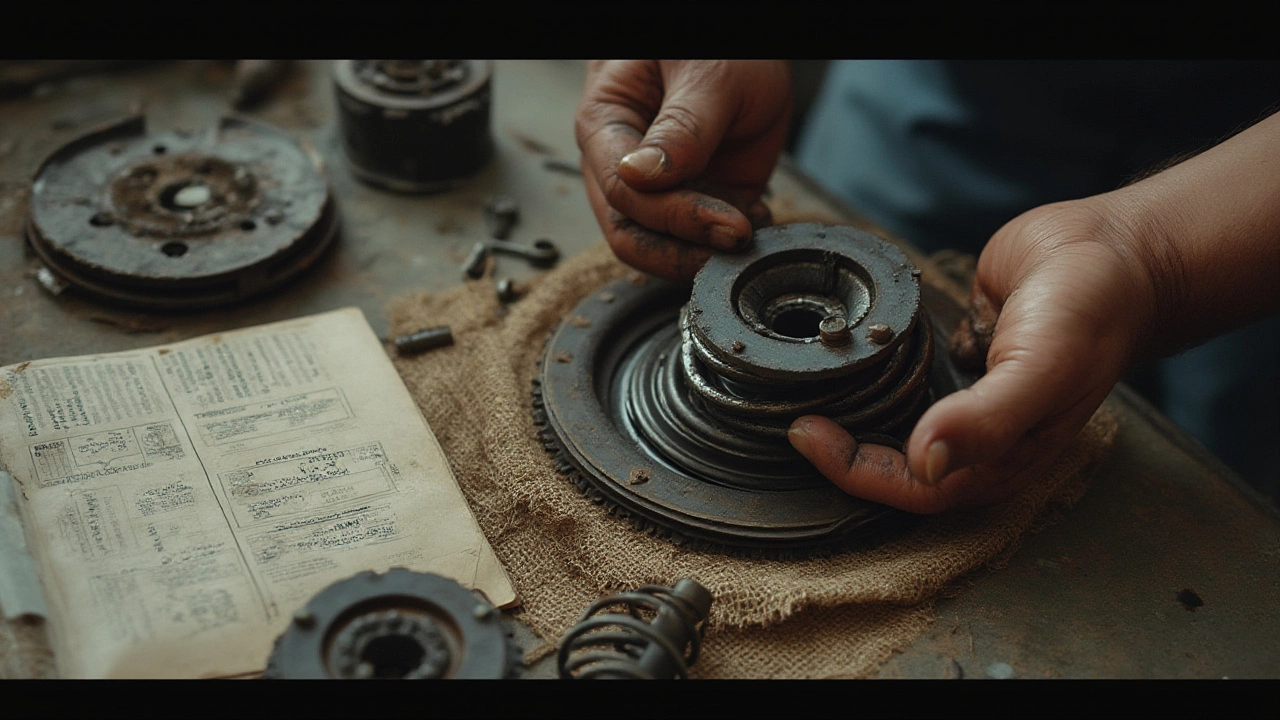
Another hurdle comes with flywheel inspection. Some flywheels can be reused, but others (dual mass flywheels, especially) may need changing—a part that can cost several hundred quid alone.
Add to this the fiddly stuff: aligning the clutch plate just right (use a centring tool unless you fancy fitting the gearbox three times), torquing the bolts to manufacturer specs, bleeding the hydraulics without spilling brake fluid on your drive, and remembering which way the clutch release bearing sits. Miss any of this, and you’ll be pulling the car apart again next week.
So, is it hard? Unless you know your way around a spanner, know how to keep safe under a car, and have mates willing to lift a deadweight gearbox with you, yes, it’s tough. If you fancy yourself handy, though, it’s doable—but research and patience count for more than muscle.
Essential Tools and Kit
The right gear makes all the difference. Before you even think about picking up your socket set, check what you’ve got. Here’s a basic shopping list for DIY clutch installation:
- Axle stands and a sturdy trolley jack—never rely on the factory jack alone.
- Decent socket and spanner set, including extension bars for awkward bolts.
- Breaker bar for those rusted-tight bolts.
- Transmission jack or a helper strong enough to support a gearbox.
- Clutch alignment tool (usually included in new kits, but check)
- Torque wrench for nailing manufacturer specs on bolts.
- Screwdrivers and pliers for all those clips and cables.
- WD-40 or similar for persuading stubborn fasteners.
- Manual or digital copy of your car’s workshop guide.
- Latex or nitrile gloves for the inevitable mess.
- Extra cardboard or a creeper for comfort under the car.
Here’s where the cost bit sneaks up on you. Most garages already have transmission jacks, massive breaker bars, and all the quirky specialty bits some gearboxes need. If you’re missing any vital tools, buying or even renting them can chip away at the savings you were hoping for. And if you skip the alignment tool, good luck—more than half of failed home clutch replacements are down to poor alignment causing trouble with the gearbox refitting.
Don’t forget—you’ll need a bit of elbow room too. Trying to do this on a narrow driveway or cramped council garage is, honestly, a recipe for pain. Best case scenario: a mate’s double garage, some brew on standby, and a day with nothing else planned.

The Step-by-Step Process: What’s Actually Involved?
You can’t wing clutch jobs. Every step needs ticking off in order, or you risk damaging something expensive or finding yourself stuck halfway with a car that won’t move. Here’s the real process, straight from the workshop:
- Disconnect the battery. Skip this and risk arcing, blown fuses, or worse.
- Raise the car and support it on proper stands. Never work under a car held up only by a jack.
- Remove wheels (front wheels, typically) to get better access.
- Unbolt the driveshafts and carefully ease them out.
- Remove gear linkages and clutch cable or slave cylinder (depends on whether yours is cable- or hydraulic-operated).
- Support the gearbox, then unbolt and gently lower it out. This is physically the toughest part.
- With the gearbox out, you’ll finally see the old clutch. Unbolt and remove the pressure plate and clutch disc.
- Inspect the flywheel. Light surface wear? Fine, but deep grooves or heat spots mean it’s time for machining or replacement.
- Clean the surface of the flywheel and pressure plate with brake cleaner—oil or grease here is a fast track to clutch judder or slip.
- Install the new clutch, using the alignment tool to make sure it’s centred.
- Bolt up the pressure plate in a criss-cross pattern to avoid warping.
- Refit the gearbox. It needs to slide perfectly onto the clutch—no forcing! If it won’t go, backtrack and check your alignment.
- Reconnect the gear linkages, clutch hydraulics, and driveshafts.
- Top up and bleed clutch fluid on hydraulic setups. Check for leaks.
- Double check all bolts and fittings, then refit the wheels and lower the car.
- Reconnect the battery, start the car, and test the clutch. Any weird noise or feeling? Don’t risk it—stop and recheck everything.
This isn’t a quick job. First-timers should budget at least a day, maybe more if anything’s seized, rusted, or needs replacing on the fly. If you’re working on a driveway in the West Midlands rain, expect breaks to shelter under a brolly.
Common Pitfalls and Smart Tips
Loads of clutch kit installations go wrong, and nearly every one follows the same pattern—miss something small, and you’ll be upside down on your driveway twice as long. Here are the usual snags and how to avoid them:
- Mixing up bolts: As silly as it sounds, dropping a handful of similar-looking bolts in a tray and guessing where they go next is a common mistake. Bag and label them as they come off.
- Stripping threads: Over-tightening, or cross-threading a bolt can quickly turn a quick job into a costly one. Always hand-thread first, and use a torque wrench to finish.
- Forgetting to check the flywheel: Reusing a damaged or warped flywheel means you’ll be swapping clutches again sooner than you’d like.
- Weak jacks or makeshift stands: Never risk your safety—crashing a gearbox or a car off a jack can cause serious injury. Invest in quality stands.
- Oiling the clutch: Keep your hands and the work area spotless. Grease or oil on clutch surfaces spells instant trouble.
- Poor alignment: If the clutch plate is even a little off-centre, the gearbox won’t refit. You’ll mate and unmate the gearbox until you lose your patience (or daylight).
- Not bleeding the hydraulics: Trapped air leads to a spongey pedal and iffy clutch engagement.
If you’re running an older model, you may hit corrosion that makes removing bolts a saga all its own. In Birmingham, where salted winter roads mean rusty undercarriages, this is nearly a given. Pre-soak stubborn nuts in penetrating oil ahead of time. And never rush. Take plenty of pictures as you go—it’s the best way to remember what goes where if you get stuck.
Is DIY Clutch Replacement Worth the Hassle?
The burning question: is it worth fitting your clutch kit at home? If you’re comfortable swinging a spanner and don’t mind crawling around under the car, you can save serious money—typical UK garages charge anywhere from £400 to over £800 for front-wheel drive clutch jobs, even more for rear-wheel drives or performance models. The parts themselves rarely run more than £150–£300 unless your model needs an expensive dual-mass setup.
But there’s a tradeoff between saving pounds and risking your buzz. If something goes sideways—say, you slip and crack a gearbox case—you could wipe out your savings, or worse. It’s also worth considering the time. Even seasoned mechanics in well-equipped shops need three or four hours, but first-timers often take all weekend.
According to a poll by the RAC, about two-thirds of UK drivers said they wouldn’t attempt major repairs on their cars, even with YouTube as backup. Of those who do, about 20% admit they’ve botched a job and had to call for help.
If you’re weighing it up, think hard about your backup plan. Got a reliable mate who’s done this before? That’s gold. But if your car is your only ride and you need it running by Monday, you might want to call in the pros. Or at least have a local garage on speed dial.
Here’s a handy table breaking down the average costs and effort for clutch kit installation:
| Factor | DIY | Garage |
|---|---|---|
| Parts Cost | £150–£300 | £150–£300 |
| Labour | Free (your sweat) | £400–£800+ |
| Time Required | 1–2 days | 3–5 hours |
| Special Tools | Yes (see list above) | Already included |
| Risk of Error | Medium–High | Low |
| Satisfaction Factor | Through the roof, if you pull it off | Standard |
If you do want to have a go, make sure to clear your schedule, have all the tools lined up beforehand, and line up a buddy for the heavy lifting. And maybe check the weather forecast for Birmingham as well—nothing takes the fun out of a project like horizontal rain halfway through the job.